Getting Started with ReactiveUI
ReactiveUI gives you the power to build reactive, testable, and composable UI code using the MVVM pattern.
See our Handbook for the ReactiveUI documentation. We also have a complete cross-platform demo app.
Getting Started
To get started visit our Installation page to install the appropriate NuGet packages for your platform. The suite installation guide covers every library and how ReactiveUI brings ReactiveUI.Binding with it.
Modern ReactiveUI with RxAppBuilder (Recommended)
RxAppBuilder is the recommended way to initialize and configure ReactiveUI applications (introduced in v21.0.1). It provides a fluent API for setting up dependency injection, view/view model registration, and platform-specific services:
var app = RxAppBuilder.CreateReactiveUIBuilder()
    .WithWpf() // Or WithMaui(), WithBlazor(), WithWinUI(), etc.
    .WithViewsFromAssembly(typeof(App).Assembly)
    .WithRegistration(locator =>
    {
        // Register your services
        locator.RegisterLazySingleton<IScreen>(() => new MainViewModel());
    })
    .BuildApp();
Learn more about RxAppBuilder in the RxAppBuilder Guide.
Key ReactiveUI Features
ReactiveUI makes it easy to combine the MVVM pattern with Reactive Programming by providing features such as:
- RxAppBuilder - Modern application initialization and dependency injection
- ReactiveUI.SourceGenerators - Compile-time code generation for reactive properties and commands
- WhenAnyValue - Observe property changes reactively
- ReactiveCommand - Asynchronous, composable command execution
- ObservableAsPropertyHelper - Transform observables into read-only properties
- WhenActivated - Manage subscriptions and prevent memory leaks
- Data Binding - Type-safe, reactive data binding
- User Input Validation - Declarative validation with ReactiveUI.Validation
The Compelling Example walks through creating a more complete application, demonstrating the power of ReactiveUI and ReactiveUI.Primitives.
Why MVVM?
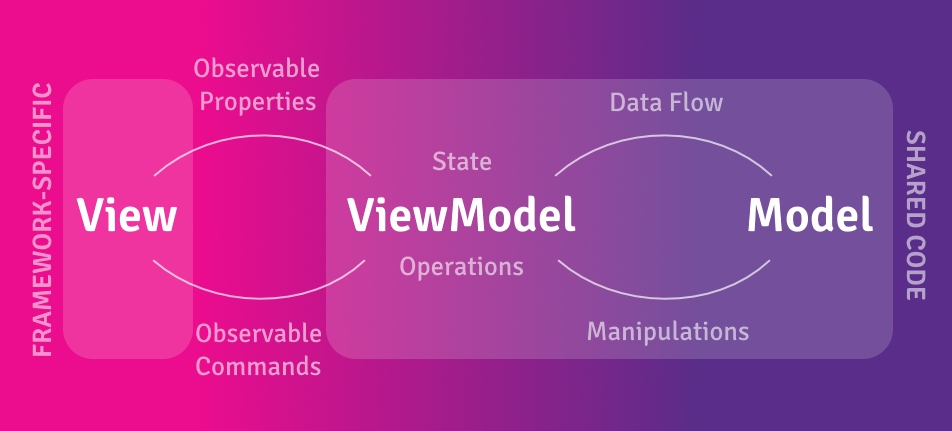
The Model-View-ViewModel (MVVM) pattern helps create more portable and maintainable codebases for cross-platform .NET applications. It increases the amount of code that can be shared between different platforms (Windows, iOS, Android, Web, etc.) and makes testing easier.
Related libraries
ReactiveUI is one library in a family. ReactiveUI.Binding runs its bindings, and ReactiveUI installs it for you. ReactiveUI.SourceGenerators, ReactiveUI.Validation, Sextant and Splat add to ReactiveUI. The documentation overview lists every library and its repository. The samples and videos show complete apps.
Next Steps
- Install ReactiveUI for your platform
- Follow the Compelling Example to build your first reactive app
- Read the Handbook to learn about advanced features
- Join the Community on Slack